A blog about food, beauty, curls and everyday living.

Wedding Series – The Guest Book

I thought long and hard about how I wanted to receive (and keep) messages from our guests on the day. And I‘m glad I did! Even if a guest book seemed quite a trivial component of the day; after all, your loved ones will wish you well in person on the day, why do you need them to also write it down?  I have three reasons why:  1) you may not even get to speak to them at all, 2) even if you do get round to everyone, you will never remember what they said, and 3) it’s nice to have a physical ‘something’ from the actual day to remind you how happy everyone was for the two of you.

Matt Ethan Photography

I had several ideas quite early on: messages typed an old fashioned typewriter; marriage advice written on recipe cards and stored in a recipe box, entitled ‘recipe for a successful marriage’; selfie Polaroid’s with handwritten messages on the back; and then there was just the plain ol’ traditional guest book. The possibilities really are endless.

As we wanted the tone of the wedding to be relaxed and non-traditional, it didn’t make sense to go for anything too conventional. I also knew that I was going to incorporate many vintage aspects in to the decor and ‘look’ of the day (my Grandmother’s china tea set, antique vases, and well...my whole ensemble). So I took some inspiration from our honeymoon plans; a road trip across the West Coast of America and started collecting a bunch of blank vintage postcards featuring places we intended to visit on our trip. I sent these out with the invites and asked everyone to write their message and bring it along on the day. Of course I bought extras for those who, like me, would forget.


People included honeymoon suggestions, marriage advice, well-wishes and even thank you notes for being included in the day. The great people at the venue hung string across trellis and I bought the cutest little pegs from Ebay for the postcards to be hung up as if on a washing line. It looked effective and meant that guests could read each other’s notes. I also loved that everyone had enough time to really think about what they wanted to write and didn’t feel rushed on the day.

Matt Ethan Photography

At the end of the night I just unhooked the string and packed the whole line away. I’ve since stored them in a memory box at home but would now like to transfer them to an album that is more easily accessible, so that whenever I feel like I need a little reminder of the day it’s in easy reach.

Matt Ethan Photography


Who else had an original guest book idea? I’d love to hear about them.

Mini Baked Vanilla Cheesecakes

I don’t think I know of one person who doesn’t like cheesecake – more specifically, BAKED cheesecake- and these mini versions are a great crowd pleaser as they don’t require cutlery (unless you’re feeling extra posh) and are individually sized so you can make exactly as many as you require. I added raspberries as a topping but most berries would work nicely.


For the base:

100g digestive biscuits
50g ground almonds
50 g unsalted butter, melted


Filling:

400 g cream cheese, at room temperature
100 ml soured cream
100 g caster sugar
1 medium egg plus...
1 egg yolk
1 tbsp corn flour
½ tsp vanilla extract
1 punnet fresh raspberries


Method:

Blitz the biscuits in a food processor and add them to a separate bowl along with the almonds and melted butter. Mix everything together with a wooden spoon or spatula until you have a mixture that just about holds together.

Line a 12-hole muffin pan with cupcake cases and press a teaspoon full of the mixture in to the base of each one. Use the back of the spoon to smooth over each base, aiming for an even layer. Place in the fridge to set until the filling is prepared.

Preheat the oven to 160C/gas 3. Use a hand blender to mix the cream cheese, sour cream, caster sugar and vanilla extract in a large bowl. Once smooth, add the whole egg and then the yolk, mixing continuously. After a few minutes you will have a creamy, fluffy texture. Add the corn flour and use a large spoon or spatula to fold this in to the mixture. 


Ladle on top of the refrigerated bases (each one should be only ¾ full as they will puff up when baking). Place 2-3 raspberries in the middle of each one and place on a shelf in the middle of the oven. Bake for 20 minutes, or until they have puffed up and are beginning to colour. 


Remove from the oven and allow to cool a little before refrigerating. You will notice that they ‘relax’ a bit once cool so don’t worry, they haven’t had the dreaded curse of the shrinks! You can serve the cupcakes either in or out of their cases but if I think they look more impressive with the cases removed (especially if you took the time to make sure that the bases are even). One bonus is that you can keep them in their cases if you’re not happy with the layers and they still look appealing. 


Do you know of any other desserts that are great in miniature? Please comment and let me know.

My Favourite Face Masks

I thought that some of you would find a quick rundown of my favourite face masks a helpful read. Just to give you some context; at this time of year my skin is dry/combination, having the potential to be problematic and spot-prone all year round. I tend to favour masks that resurface and decongest but that don’t strip my skin of all of its moisture. I have also had reactions to lavender and mineral oil in the past so I avoid those particular ingredients at all costs.

L-R: Nuxe, Aesop, James Read, Ren


The Moisture Mask -Nuxe crème Fraiche De Beauté Masque - £18.50 for 50ml

I featured this mask in a previous post on winter skincare so check that out as I have gone in to a little more detail there. But in short, this mask is very much like an intensive moisturiser; it applies just like a rich moisturiser and can be left on overnight to replenish and soothe even the most dehydrated of skins. No peeling or washing off, just slap it on and go to sleep! (P.S. if you can remember to apply a layer of this after taking off your makeup - but before passing out - after a night of drinking, your skin will thank you in the morning for doing so).


The Clay Mask– Aesop Primrose Facial Cleansing Masque – £23 for 60ml

‘Mud Masks’ were like, so totally 80’s - It’s all about the clay now darling. Having problematic skin, I am a big fan of masks that include clay because of its healing properties and ability to eliminate toxins from the body. This particular mask from Aesop is a wonderful product as it contains two types of clay - Kaolin and Bentonite – that are listed within the first three ingredients (along with water) in the ingredients list. It is a very lightweight formula that once dry, isn’t...well, too dry! Your skin still feels as if it can breathe whilst you have this on. The instructions advise to leave this on for 15 minutes but I have been known to leave it on for up to half an hour with positive effects. My skin is left feeling clearer and less congested, but nicely hydrated, and all of the angry bumps that were there before seem to shrink. My skin just feels generally calmer. It also smells gloriously green and floral – very ‘spa’ like.


The Peeling Mask – James Read Tan Perfecting Enzyme Peel Mask - £12 for 75ml

This is the kind we all envisage when we hear the words ‘face mask’. You know, the ones you used as a teenager, waiting for the second they felt dry so that you could pretend as if you were peeling off the top layer of skin? Well this mask is exactly that. It’s a clear gel texture that sets to a smooth plastic-like film on the skin. Once peeled, my skin is left feeling clean and smooth as if all of the dead skin has been peeled away. Because of this, and as its name suggests, it is great used in preparation for tanning. The enzymes lightly exfoliate, whilst the inclusion of cucumber and pomegranate help to combat wrinkles (excellent news!). The only negative is the smell – although alcohol doesn’t seem to appear in the ingredients list, it smell quite strongly of alcohol; this does however disappear once the mask has set.


The Brightening Mask – Ren Glycolactic Radiance Renewal Mask - £32 for 50ml

I love to use this one when my skin is looking a little lacklustre and dull, and needs brightening up. The first time I used it felt a little strange but do not let the fact that it has the texture and smell of marmalade put you off! The instructions advise to use this only once a week and to leave it on for 10 minutes, and honestly, I would suggest sticking to that as it can tingle a little whilst working its magic. And if you have very sensitive skin then you may want to give this one a miss altogether. However, I’m of the view that “tingling is good, but burning is bad” and I haven’t felt the burn with this one yet so it remains a ‘keeper’ for me.
This mask is intended to be removed with warm water. As an added bonus, a muslin cloth is included which really helps with its removal due to the products ‘sticky’ consistency. I just love how radiant my skin looks after I use this! The natural fruit acids (passion fruit, lemon, grape and pineapple) help to exfoliate the top layer of skin and reduce fine lines. I also like that my pigmentation and acne scars appear lighter and a little less visible once I wash this off. 


I’d love to know of your ‘Holy Grail’ masks. Have I missed any good’uns from the list?

Chia Berry Jam

Happy Mother’s day to all the UK readers! I decided to post a recipe for this delicious chia berry jam today, seeing as I made a batch and included it in a hamper of tasty goodies for my lovely mum (whom by the way eats a diet free from sugar, gluten, nuts, and dairy). The jam is very easy to prepare and has that same ‘jammy’ texture you come to expect from the standard shop-bought varieties; but without all of the refined sugar, and with an extra measure of protein.


Makes 6 small jars (or 1 regular jam jar)

Ingredients:

300g frozen berries
2 tbsp honey
2 tbsp chia seeds


Method:

Add the berries and honey to a pan on low heat. Once bubbling (after 5 minutes or so), lightly mash with a fork and add the chia seeds. Continue to cook on a low heat for 15 minutes, stirring occasionally. 


Whilst the jam is cooking, sterilise your jam jars - either in the dishwasher or with boiling water – and leave to dry upside down. Allow the jam to cool slightly before decanting in to the sterilised jars. Once filled, leave the lids off until the jam has completely cooled; it will also become firmer and ‘set’ once cool. 


The jam will keep for around a week in the fridge. It’s another great breakfast alternative to enjoy on toast (with peanut butter), in porridge or with yoghurt.

Please let me know if you try any variations of this recipe; I’m trying apricot next so I will keep you posted...

Winter Eats - Spiced Milk Porridge

This is a recipe for those cold, wet morning (like we have so often in England) when you absolutely must start off the day with something warm inside your belly.  To save on time, you can make the milk several days in advance, keep it in the fridge, and then simply reheat when needed.  I made porridge with oats and quinoa but you could make straight up oatmeal, or even add the hot milk to cereals – anyone else remember having Weetabix and hot milk as a child?


Serves Two

For the Milk:

200ml milk (I used Oat, nut or dairy options work too)
3 cardamom pods, outer shell removed
½ cinnamon stick
1 star anise
3 cloves
2 tsp honey


The Porridge:

4 cups of organic whole oats
6 cups of water
2 cups cooked quinoa


Method:

Add the spices to a pestle and mortar or spice grinder to make a coarse spice mix.


Add this to a tea infuser. My infuser was made from metal but you can get rubber versions or even use muslin tied with string (for all my Bridget Jones fans out there, just make sure the string’s not blue!).  Add the infuser to a saucepan with the milk (cold) and bring up to the boil. Once boiling, quickly turn the heat down to a simmer and leave to infuse for ten minutes. 

Remove the infuser and add the honey, stirring until dissolved. Either transfer the milk to a jar and refrigerate, or use immediately.


In a separate pan, add the oats and water and cook for around 5-10 minutes on medium heat until almost all of the water has evaporated and the oats are tender. Turn out the pan and add the quinoa and warm milk.
I served the porridge with bee pollen, chia seeds, some extra honey, and half a baked apple (sliced and baked in the oven for ten minutes with a little coconut oil).

If porridge isn’t your thing, then the warm milk can simply be drunk on its own (as a sort of ‘chai tea’ – which is great before bed!) or added to coffee to spice things up a bit.

Let me know what your favourite winter warmer breakfasts are...

Winter Skincare Essentials

I had always considered myself to have pretty ‘normal’ skin – slightly oily in the summer and then more dry in the colder months – but as I’ve got older, my skin has reacted in more extreme ways to contrasting climates. This current winter I have particularly suffered with dry, very parched skin so I needed to change up my skincare accordingly. I swapped to richer, weightier formulas aimed to sooth and nourish dehydrated skin and I think I’ve found some products I would even consider awarding with ‘Holy Grail’ status. And that term is never one to be used lightly...

L - R Nuxe Creme Fraiche Mask, Laura Mercier Body Souffle, Eucerin Soothing Care Moisturiser, Blistex Relief Cream

Eucerin Ultra Sensitive Soothing Care Moisturiser

I have discovered Eucerin skincare in the last year. It is one of those ‘French Pharmacy’ brands, a notion that is becoming more and more popular in the UK (and for good reason too). This particular moisturiser is aimed at hypersensitive, reactive skin and is free from parabens, fragrance, alcohol etc, etc, etc. I find that it leaves my skin feeling nourished but not greasy. It’s also a great base for makeup as it absorbs very quickly but keeps skin feeling moisturised all day. It really was a great find! I have the dry skin formula, but there is also a formula for oily skin so I will be trying that out in the summer.


Nuxe crème Fraiche De Beauté Masque

Another French Pharmacy Hero! Despite the very wordy (totally French) name, this product is a straightforward intensive moisture mask. It is designed to be used when flying, to add an extreme hit of hydration that lasts for 24 hours. Unlike the traditional offerings we have come to expect when we hear the word ‘mask’ (the ones where you can’t move your face or that you peel off like a second skin), it is lightweight and does in fact appear to be just like an ordinary moisturiser. But boy does it pack a hydrating punch! The instructions suggest leaving the mask on for 10 minutes, then to massage in any excess product, or remove it with a light cleanser. I prefer to do the former and leave it overnight to really work its magic. In the winter I use it twice a week but it’s also become a travel essential as it is ideal for when skin feels ‘thirsty’ after a day in the drying sun.


Blistex Relief Cream

For those days when no other lip balm will cut it! I have used Elizabeth Arden’s Eight Hour Balm for years but for some reason, it just wasn’t doing the job this year. I had what could only be described as ‘lizard lips’ but within two days of using this they were back to feeling smooth and plump. It does contain ammonia, so smells very medicinal and leaves a thick white cast on the lips so I would suggest using it sparingly in the day and then really layer it on overnight.


Laura Mercier Soufflé Body Crème

It doesn’t matter what I do, my pins are dry and flaky all year round, but in the winter they’re a whole new kind of dry. That’s why for me any kind of moisturiser is a necessity but I particularly enjoy products with a soufflé or body butter type consistency as they tend to be thicker and richer, meaning they stick around for longer before I need to slather on another layer. I love the deliciously scented offerings from the Laura Mercier ‘Gourmand’ range for this very reason and Crème De Pistache is my ultimate fave (even if wearing it does make me crave pistachio ice cream all day!). Oils work nicely too but in my experience can sometimes be a little messy and take a while to dry so are not recommended at night if you have just put on your fancy bed sheets. 


Please comment and let me know what your winter skin essentials are...

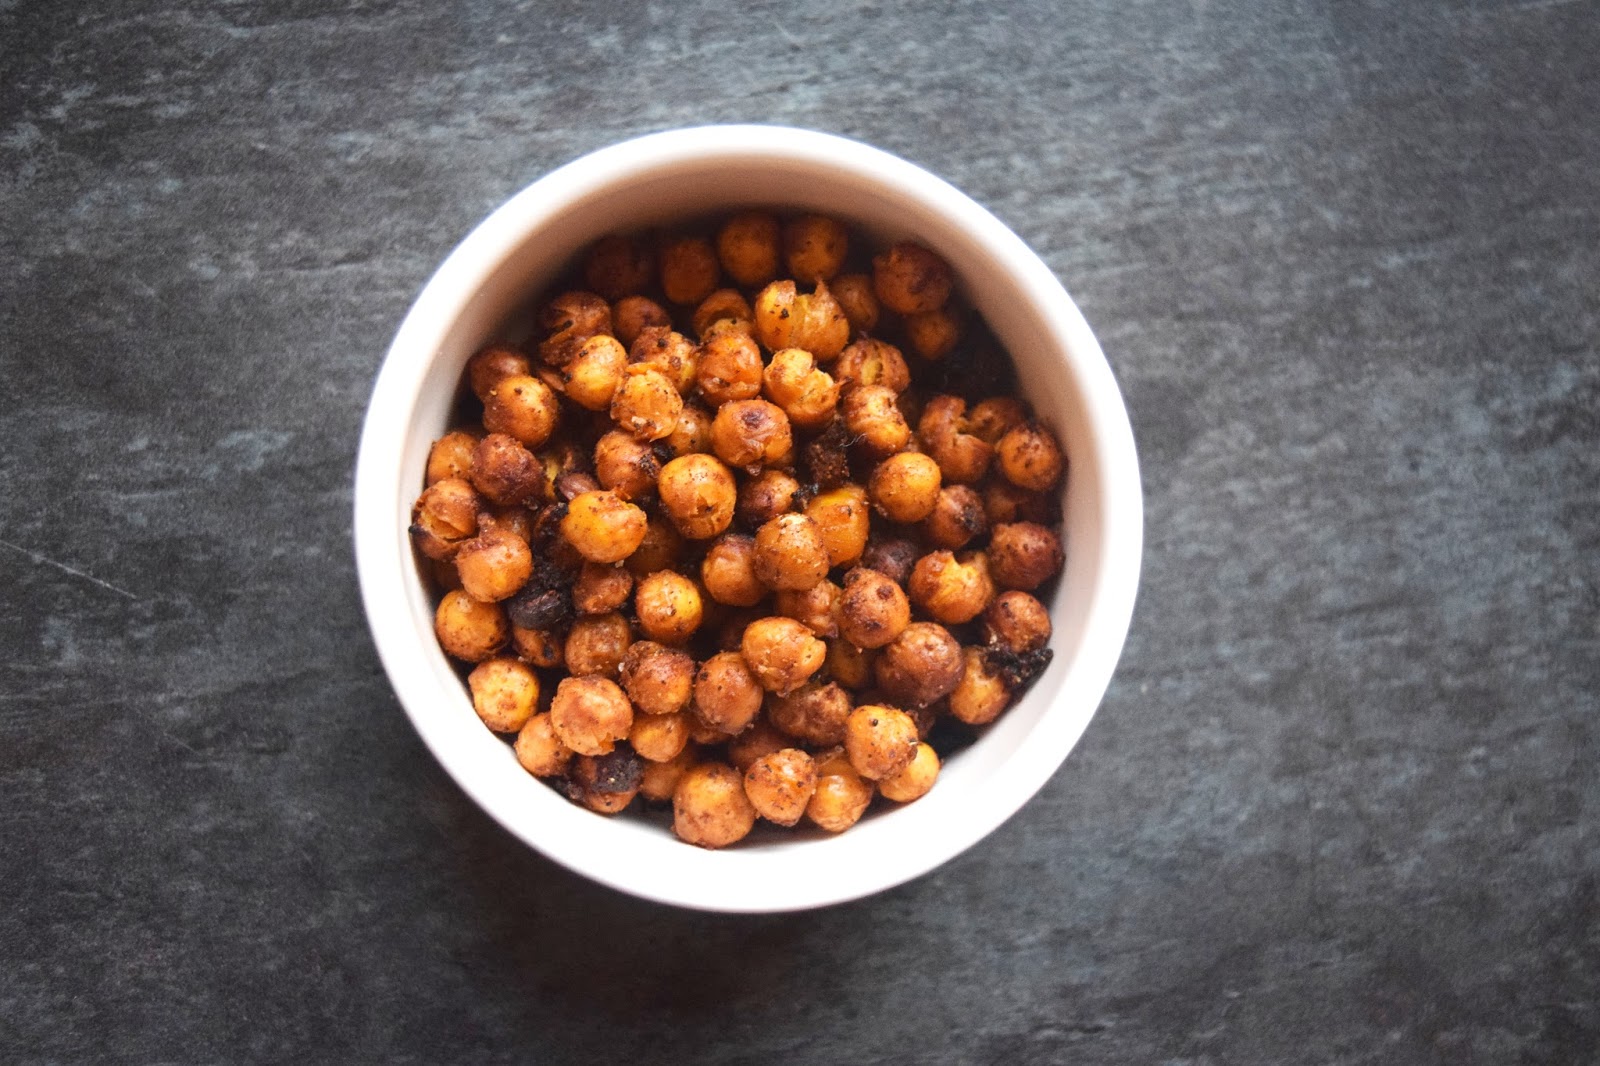
The Best Afternoon Snack - Crunchy Spiced Chickpeas

It can be quite difficult to find the perfect snack for that 4 o’clock slump. I often find myself reaching for a piece of fruit as it’s what’s to hand, and because let’s face it - it’s easy. But for times when I’m trying to watch my fruit intake (i.e. on days when I have already eaten 4 portions of fruit), or if I simply fancy something savoury, then an apple just doesn’t cut it!


These spiced chickpeas are fairly quick and easy to prepare, yet very tasty, and provide the type of crunch which you would come to expect from a bag of crisps. 

Ingredients:

250g canned chickpeas (drained)
2 tsp oil (rapeseed)
1 tsp harissa paste
1 tsp five spice
Salt and pepper to taste


Method:

Preheat the oven to 220C/gas 7 and lay the chickpeas on a kitchen towel to dry as much of the moisture from them as possible. Mix the oil, spice and paste together in a separate bowl. 


Once dry, scatter the chickpeas in one even layer on a baking tray and drizzle with only half of the spice mixture. Roast them in the oven for 20-30 minutes, shaking the tray every 10 minutes or so. 


You will know they’re ready when they are golden brown and have a crunchy outer shell (some of the chickpeas may pop open but that’s fine). Cover the roasted chickpeas in the remaining mixture and serve immediately. 


The longer you leave them to cool, the less crunchy they will remain – whilst cooling they take on a wonderfully chewy texture that it just as satisfying as the original crunch.


And these little gems are not just another afternoon snack; they fulfil many roles, including being the perfect accompaniment to an ice cold beer, as well as acting as a more saintly version of a crouton on salads.

Post Signature

Post Signature