A blog about food, beauty, curls and everyday living.

Showing posts with label food. Show all posts

The Creamiest Tomato Soup (that’s also vegan and gluten-free – astonishingly!)


There is nothing more comforting than a bowl of steaming tomato soup on a wet and miserable day. And whilst we are now in to the summer months in England, Mother Nature clearly didn’t get the memo!
I wanted to replicate that old classic tomato soup that we all know and love from Mr Heinz. It’s creamy and smooth, and very ‘tomatoey’ but also on the sweeter side.


As I try not to consume too many animal fats, I wanted to find an alternative to cream. Having recently enjoyed a delicious cashew cream dessert from a local deli I immediately knew that cashew nuts were going to be my new favourite super ingredient (sorry coconut, we had some good times together, but it’s time to move on).


Makes 4 starter-sized bowls


Ingredients:

1kg vine tomatoes (I used a mixture of larger vine tomatoes as well as piccolo for their sweetness)
2 medium carrots, diced
3-4 cloves of garlic
1tsp olive oil
8 – 10 raisins (for sweetness)
60g raw cashews
250ml vegetable stock (1 tsp of this bouillon from Marigold mixed with boiling water is a great vegan alternative to fresh stock) 
Salt and pepper to taste
 

Method:

Preheat oven to 160C/gas mark 4. Halve any larger tomatoes and place in a baking tray with the carrot and smaller tomatoes. Season with salt and pepper, drizzle with olive oil and bake in the oven for 30-40 minutes. After that time, the tomatoes should be soft but not caramelised. Add the cashews, garlic and raisins. Bake for a further 10-15 minutes, until the cashew nuts are golden. 


Heat the stock until just warm. Ladle half the ingredients in to a mixer (I used my Nutribullet – yet again!) and mix with half of the stock until smooth. Empty the soup to a container or pan and blend the other half of the mixture with the rest of the stock. I use the remaining stock to deglaze the roating tin to achieve maximum flavour potential. Either heat the soup through and eat immediately or store in the fridge for up to four days.


To make soups extra special – or just a little more exciting – I like to top them with flavoursome ingredients. Here, I fried field mushrooms with black kale and garlic and also included some roasted cashews.


Now, my husband enjoys dunking a great hunk of crusty bread, which doesn’t exactly follow the gluten-free trend, but then again I’m not sure he has cottoned on that this soup is fit for even the strictest of vegans (shhhhh)!

The Wedding Detox - Store Cupboard Ingredients for Healthy Eating

In the months leading up to my wedding I did what most brides to and began to be more disciplined with my calorie intake and decided to exercise a little more frequently (I even took part in ‘boot camp’ style classes early on a Saturday morning). I was fairly happy with my figure to begin with and didn’t want to make any drastic changes, especially as my dress had been altered to fit like a glove, but knew that this was the one day when I wanted to look and feel at my absolute best.

In the final week before the big day I decided to follow a detox plan by Dietitian, Juliette Kellow. I had discovered it quite a few months earlier and remembered having some noticeable results; I’d lost a few pounds, felt lighter and trimmer, my skin was clearer and I seemed to have lots more energy. All boxes ticked!

I would like to highlight that this isn’t one of those crazy ‘eat nothing but pepper and lemon juice for three weeks’ fads that had been very popular a few years ago (mainly because of a particularly bootylicious babe that shall remain unnamed!). It is intended to be followed for only seven days and shouldn’t leave you short of nutrients as all of the components are natural, wholesome food sources. It’s pretty easy to follow as it’s separated in to ‘foods to include’ and ‘foods to avoid’ (red meat, caffeine and alcohol to name a few – ouch! But hey, it’s only seven days). The ‘foods to include’ list is quite extensive and incorporates a mix of fresh produce as well as dried and canned ingredients.

If you’re looking to detox then take a look, but I’d like to run through some of the elements of the plan that I still consider ‘essentials’ in my day-to-day diet.  I found these items to be extremely versatile, and always having them stored in the pantry means that I’m never too far from a healthy meal – so no excuses!


Nuts and seeds – My favourites are cashews and almonds but all variations are great. Add them to stir fries, as salad toppings, or roasted and enjoyed as a snack. Flax seeds are a good alternative to Chia seeds when added to smoothies and cereals. Nut butters are also a favourite for thickening smoothies and adding protein.

Brown rice – including pasta and noodles made from brown rice flour. The possibilities are endless.

Pulses and beans – dried or canned (in water only, not brine). These can be the main protein source for a soup or curry, or blended and made in to a dip. Try roasting chickpeas in spices like I did here.

Canned vegetables – A humble can of tomatoes can be the basis of a sauce for pretty much any meal; chilli, lasagne, curry, pasta, soup. These canned sweet cherry tomatoes are a little pricier, but well worth it!

Honey – as sugar is on the ‘avoid’ list, honey is the next best thing. I like to include Manuka honey in teas, salad dressings and sauces (and anywhere else you would normally add a pinch of sugar). It doesn’t have to be Manuka, but I like added benefits that come with it.

Coconut Oil – A wonder ingredient. Full stop.

Rye Bread - This is a great alternative to bread made from wheat. It does take some getting used to but it's nice and filling - and better once toasted and topped with avocado and salmon, or with peanut butter. It can be a vessel for both sweet or savoury fillings.

Stock and spices – When cooking, I use lots of fresh and dried herbs and spices. I try to avoid using large amounts of salt – although I do use pink Himalayan salt – but don’t want my food to be lacking in flavour. These Kallo vegetable stock cubes are great as they are organic and low in sodium. A can of coconut milk is another cupboard hero of mine.


I do, of course, shop for fresh ingredients every few days but when doing a ‘big shop’ I like to buy two of every item mentioned above so that I know have the basis of a healthy meal to hand.


Let me know what your store cupboard heroes are.

Instant Bread and Butter Pickle

This is a great recipe for those who are new to pickling and aren’t necessarily interested in being in it for the long haul; if you want to enjoy pickles but haven’t had the forethought to plan a few months ahead. The recipe came about because I was having friends over for a BBQ pulled pork feast and decided last minute to make this as an accompaniment (I also added a whole chilli as I wanted to spice things up a bit). This pickle is very versatile and can also be enjoyed in an array of sandwiches, with cold meats and cheese, or - as the name suggests – simply paired with bread and butter.


Ingredients:


Half white cabbage, chopped
½ cucumber, sliced
1 whole red chilli, sliced
1 red onion, sliced
4 cloves garlic, chopped
1 tbsp grain mustard
3 tbsp vinegar (any, except balsamic)
3 tbsp water
1 tbsp sugar


Method:


Add all of the ingredients to a pan and cook on high heat until the liquid begins to boil. Place a lid on top and turn down the heat to low. Cook for 10-12 minutes, checking from time to time that there still remains a small amount of liquid at the bottom of the pan (this will stop the vegetables from burning). If needed, add another tbsp of water. Once the cabbage is tender and can be easily pierced with a knife, turn the heat off and leave the lid on whilst the pickle cools. Transfer to a jar or container and refrigerate until ready to use. It will keep in the fridge for around 5 days.

Gooey Chocolate Brownies (With an Easter Twist)

These gooey brownies are extremely easy to make and taste amazing! If you are feeling creative, try topping some them with flaky nests. I have to admit, they were slightly fiddly, but were well worth the effort as they looked great and tasted extra chocolaty.


Makes 2 small trays (around 18 brownies)


Ingredients:


200g caster sugar
125g salted butter, melted
30g cocoa powder
½ tsp vanilla extract
2 medium eggs
110g plain flour
¼ tsp baking powder


For the Nests:

3 Cadbury’s Flake bars
1 pack Milkybar Mini Eggs
30g dark chocolate, melted


Method:


Begin by lining a deep tray 20cm x 10cm with greaseproof paper (I used two 10 x 10 trays which worked fine too). When lining trays, I find it easier to cut a piece of greaseproof slightly larger than the area needed and then cut a small incision from each corner (at 45 degrees) towards the middle of the paper.  This will help when placing the paper inside, as each corner can then be overlapped to fit snugly in to the corners of the tray. 

Once the mixture has been made, a little blob on each corner of the tray will help to hold the lining in place and stop it from sliding around. Preheat the oven to 180C and weigh out all of the ingredients so that the mixing process is quick and efficient. 

Add the sugar and butter to a mixing bowl and using an electric mixer, beat until light and fluffy. Add the cocoa powder, vanilla, and eggs - one at a time - continue to mix on high speed until you have a smooth mixture.


Add the baking powder to the flour and fold in with a spatula or wooden spoon. 


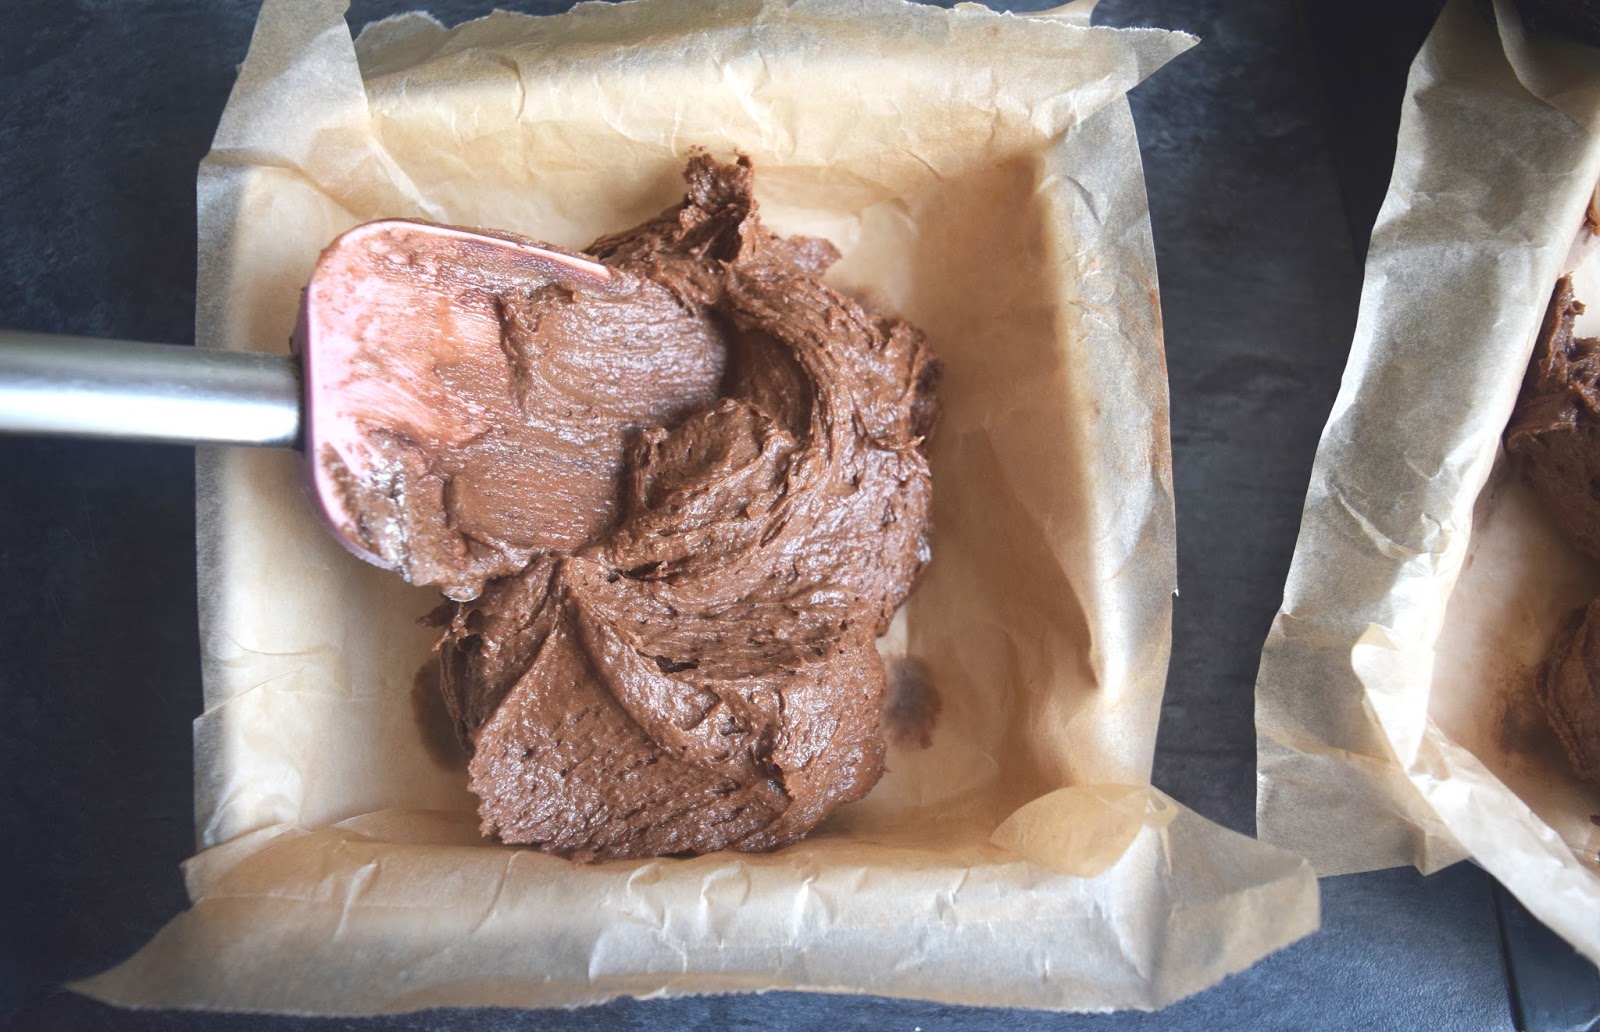
Pour the mixture in to the tray and then even it out with the back of a spatula. Bake in the oven for 20-25 minutes.

The longer you leave them, the more ‘set’ they will be once cool. I personally prefer a gooey brownie so I opt for just 20 minutes. Remove from the oven and when slightly cool, place in the fridge until ready to use.


Whilst the brownies are baking, make the nests. Simply melt the dark chocolate and cut the flake bars length ways to create long, thin ‘shards’. I think that dark chocolate works best here for adhering as it dries quickly and is less temperamental when melting. But by all means, use milk chocolate if you want the joins to be less obvious (and don’t go thinking that you can use any wastage from the Flakes; the stuff just will not melt! Which leaves me wondering - why the hell not?)


Place some of the shards in a small triangular(ish) shape. Dip the ends in melted chocolate to allow them to stick together. Then dip the bottom of the eggs in the chocolate and place them on top of the triangle base.


Add extra flakes wherever you need more support, using the ‘dip and stick’ method. 

These should be refrigerated until the chocolate ‘glue’ has set. Once the brownies are completely cool, slice them in to even squares and use a fish slice to lift and place the nests on top. You can use the chocolate ‘glue’ here too so that the nests don’t topple off.


You can make these a few days ahead and leave them refrigerated in an airtight container. You will of course then have to avoid the temptation to eat them before intended.


Happy Easter everyone!

Easy Peasy Cheat's Crème Patisserie

This is not a pastry cream that the French would be proud of, but it’s quick, easy, and will happen on your first attempt (yes, I have been through many boxes of eggs before trying to achieve custard that doesn’t resemble something I could eat on toast for breakfast).


Ingredients:

250ml whole milk
50ml single cream
80g caster sugar
2 egg yolks, plus...
1 whole egg
2 tbsp corn flour
1 tsp vanilla extract (not pods, unless you want the seeds to be visible)


Method:

Start by heating a small pan of water (around 3cm deep) on a medium heat. The water should be at a rolling - not fierce - boil. Then away from the heat, in a metal bowl that is large enough to rest on top of the pan, whisk the ingredients together. It MUST be a metal bowl as the heat that is retained by the metal is what helps cook the eggs later on.


Place the bowl on top of the pan and stir slowly and continuously with the whisk while the heat from the boiling water heats the eggs. You cannot let it sit still for even a few seconds! It will take around 10 minutes for the eggs to cook and for the mixture to become thick custard, but what’s great is that the corn flour will prevent the eggs from overcooking and scrambling. It’s usually overcooking that gives the ‘eggy’ taste.


I will warn you that waiting for the mixture to thicken will feel like an eternity but you will need to keep your wits about you as the mixture will thicken almost in an instant! The second you feel that slight resistance, whisk more briskly for a few seconds to prevent lumps from forming and use an oven mitt or dishcloth to remove the bowl from the heat.


Continue to whisk once removed as the heat from the metal bowl will continue to cook the eggs. Transfer in to a bowl straight away and leave to cool before refrigerating. You will need to cover with cling film to stop a skin forming whilst in the fridge.


You can use this cold custard for many things: custard tarts, doughnuts; or even serve it warm with your favourite dessert. The corn flour helps to stabilise the mixture so re-heating in the oven (for something like Portuguese custard tarts) is not a problem and if reheating on the hob: as long as you whisk until hot, you’ll be fine.

Please comment and let me know if you try this out.

Mini Baked Vanilla Cheesecakes

I don’t think I know of one person who doesn’t like cheesecake – more specifically, BAKED cheesecake- and these mini versions are a great crowd pleaser as they don’t require cutlery (unless you’re feeling extra posh) and are individually sized so you can make exactly as many as you require. I added raspberries as a topping but most berries would work nicely.


For the base:

100g digestive biscuits
50g ground almonds
50 g unsalted butter, melted


Filling:

400 g cream cheese, at room temperature
100 ml soured cream
100 g caster sugar
1 medium egg plus...
1 egg yolk
1 tbsp corn flour
½ tsp vanilla extract
1 punnet fresh raspberries


Method:

Blitz the biscuits in a food processor and add them to a separate bowl along with the almonds and melted butter. Mix everything together with a wooden spoon or spatula until you have a mixture that just about holds together.

Line a 12-hole muffin pan with cupcake cases and press a teaspoon full of the mixture in to the base of each one. Use the back of the spoon to smooth over each base, aiming for an even layer. Place in the fridge to set until the filling is prepared.

Preheat the oven to 160C/gas 3. Use a hand blender to mix the cream cheese, sour cream, caster sugar and vanilla extract in a large bowl. Once smooth, add the whole egg and then the yolk, mixing continuously. After a few minutes you will have a creamy, fluffy texture. Add the corn flour and use a large spoon or spatula to fold this in to the mixture. 


Ladle on top of the refrigerated bases (each one should be only ¾ full as they will puff up when baking). Place 2-3 raspberries in the middle of each one and place on a shelf in the middle of the oven. Bake for 20 minutes, or until they have puffed up and are beginning to colour. 


Remove from the oven and allow to cool a little before refrigerating. You will notice that they ‘relax’ a bit once cool so don’t worry, they haven’t had the dreaded curse of the shrinks! You can serve the cupcakes either in or out of their cases but if I think they look more impressive with the cases removed (especially if you took the time to make sure that the bases are even). One bonus is that you can keep them in their cases if you’re not happy with the layers and they still look appealing. 


Do you know of any other desserts that are great in miniature? Please comment and let me know.

Chia Berry Jam

Happy Mother’s day to all the UK readers! I decided to post a recipe for this delicious chia berry jam today, seeing as I made a batch and included it in a hamper of tasty goodies for my lovely mum (whom by the way eats a diet free from sugar, gluten, nuts, and dairy). The jam is very easy to prepare and has that same ‘jammy’ texture you come to expect from the standard shop-bought varieties; but without all of the refined sugar, and with an extra measure of protein.


Makes 6 small jars (or 1 regular jam jar)

Ingredients:

300g frozen berries
2 tbsp honey
2 tbsp chia seeds


Method:

Add the berries and honey to a pan on low heat. Once bubbling (after 5 minutes or so), lightly mash with a fork and add the chia seeds. Continue to cook on a low heat for 15 minutes, stirring occasionally. 


Whilst the jam is cooking, sterilise your jam jars - either in the dishwasher or with boiling water – and leave to dry upside down. Allow the jam to cool slightly before decanting in to the sterilised jars. Once filled, leave the lids off until the jam has completely cooled; it will also become firmer and ‘set’ once cool. 


The jam will keep for around a week in the fridge. It’s another great breakfast alternative to enjoy on toast (with peanut butter), in porridge or with yoghurt.

Please let me know if you try any variations of this recipe; I’m trying apricot next so I will keep you posted...

Winter Eats - Spiced Milk Porridge

This is a recipe for those cold, wet morning (like we have so often in England) when you absolutely must start off the day with something warm inside your belly.  To save on time, you can make the milk several days in advance, keep it in the fridge, and then simply reheat when needed.  I made porridge with oats and quinoa but you could make straight up oatmeal, or even add the hot milk to cereals – anyone else remember having Weetabix and hot milk as a child?


Serves Two

For the Milk:

200ml milk (I used Oat, nut or dairy options work too)
3 cardamom pods, outer shell removed
½ cinnamon stick
1 star anise
3 cloves
2 tsp honey


The Porridge:

4 cups of organic whole oats
6 cups of water
2 cups cooked quinoa


Method:

Add the spices to a pestle and mortar or spice grinder to make a coarse spice mix.


Add this to a tea infuser. My infuser was made from metal but you can get rubber versions or even use muslin tied with string (for all my Bridget Jones fans out there, just make sure the string’s not blue!).  Add the infuser to a saucepan with the milk (cold) and bring up to the boil. Once boiling, quickly turn the heat down to a simmer and leave to infuse for ten minutes. 

Remove the infuser and add the honey, stirring until dissolved. Either transfer the milk to a jar and refrigerate, or use immediately.


In a separate pan, add the oats and water and cook for around 5-10 minutes on medium heat until almost all of the water has evaporated and the oats are tender. Turn out the pan and add the quinoa and warm milk.
I served the porridge with bee pollen, chia seeds, some extra honey, and half a baked apple (sliced and baked in the oven for ten minutes with a little coconut oil).

If porridge isn’t your thing, then the warm milk can simply be drunk on its own (as a sort of ‘chai tea’ – which is great before bed!) or added to coffee to spice things up a bit.

Let me know what your favourite winter warmer breakfasts are...

Post Signature

Post Signature